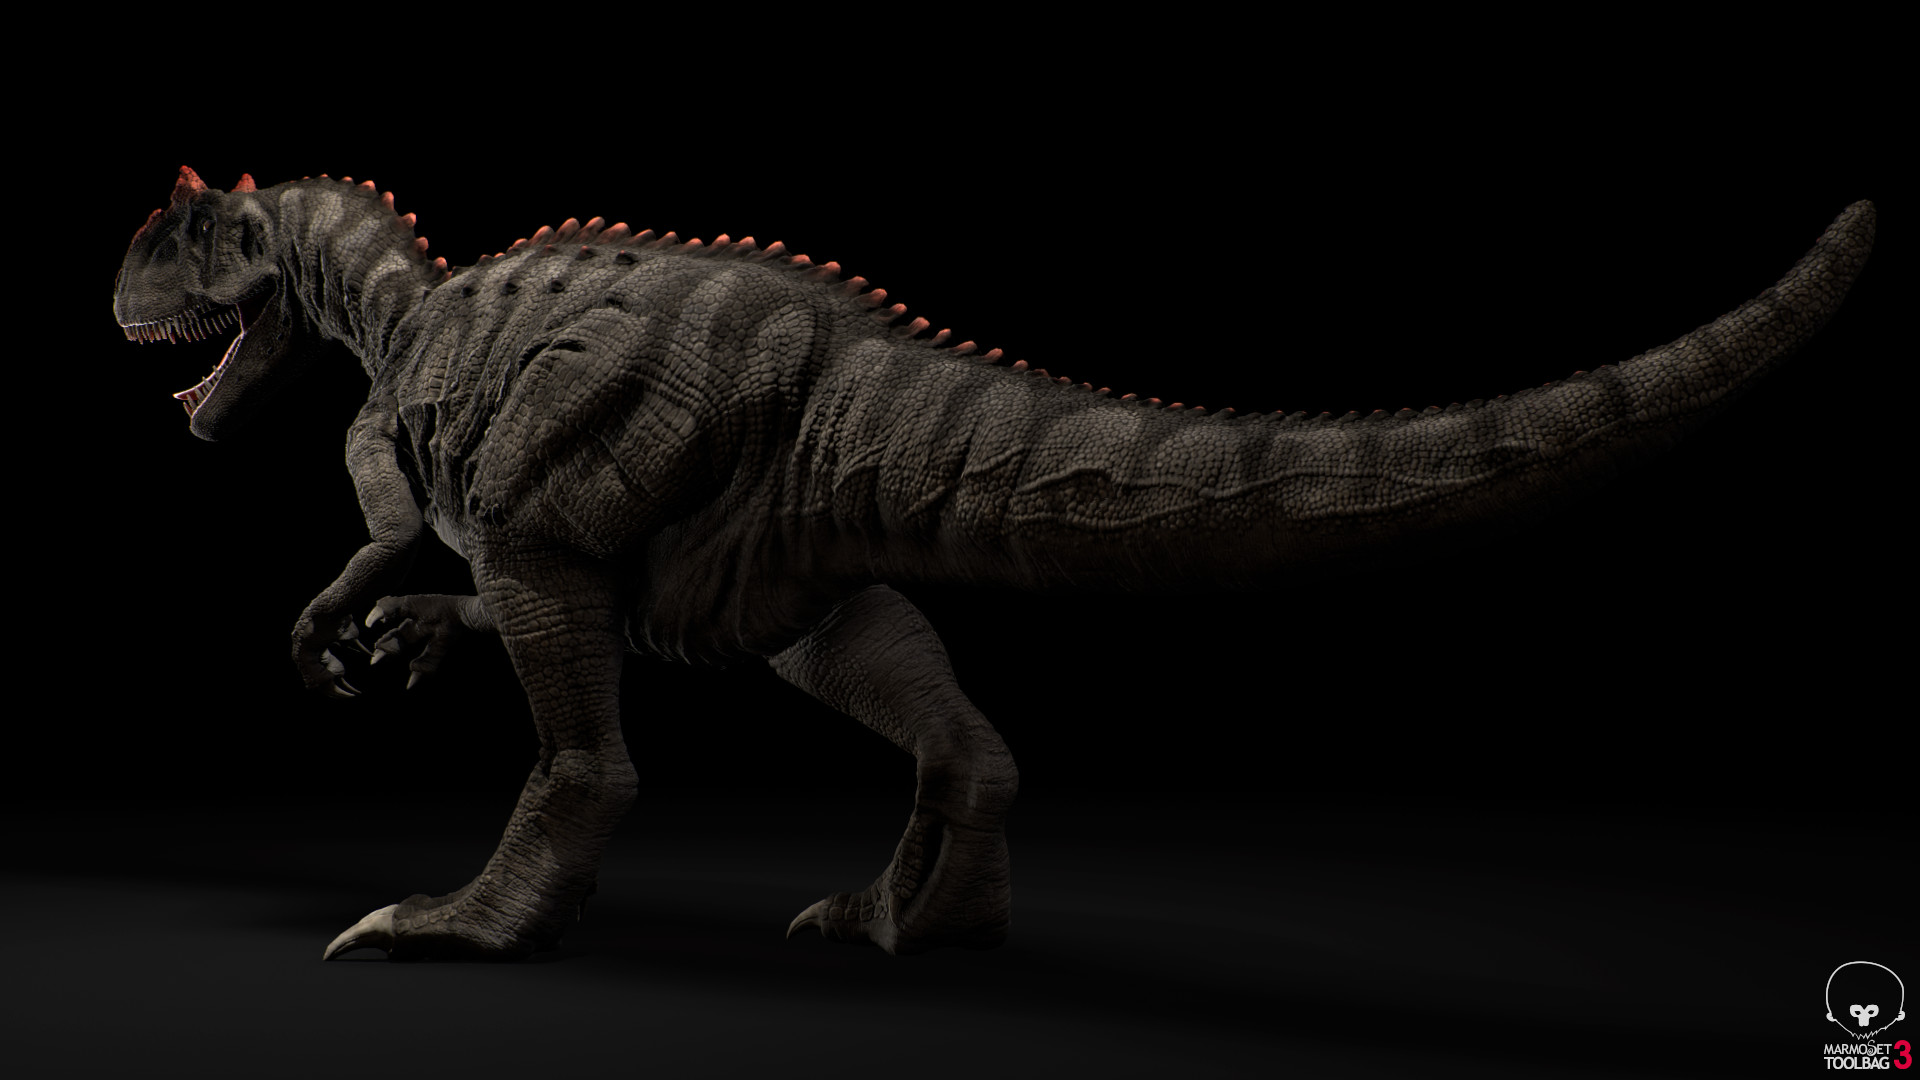
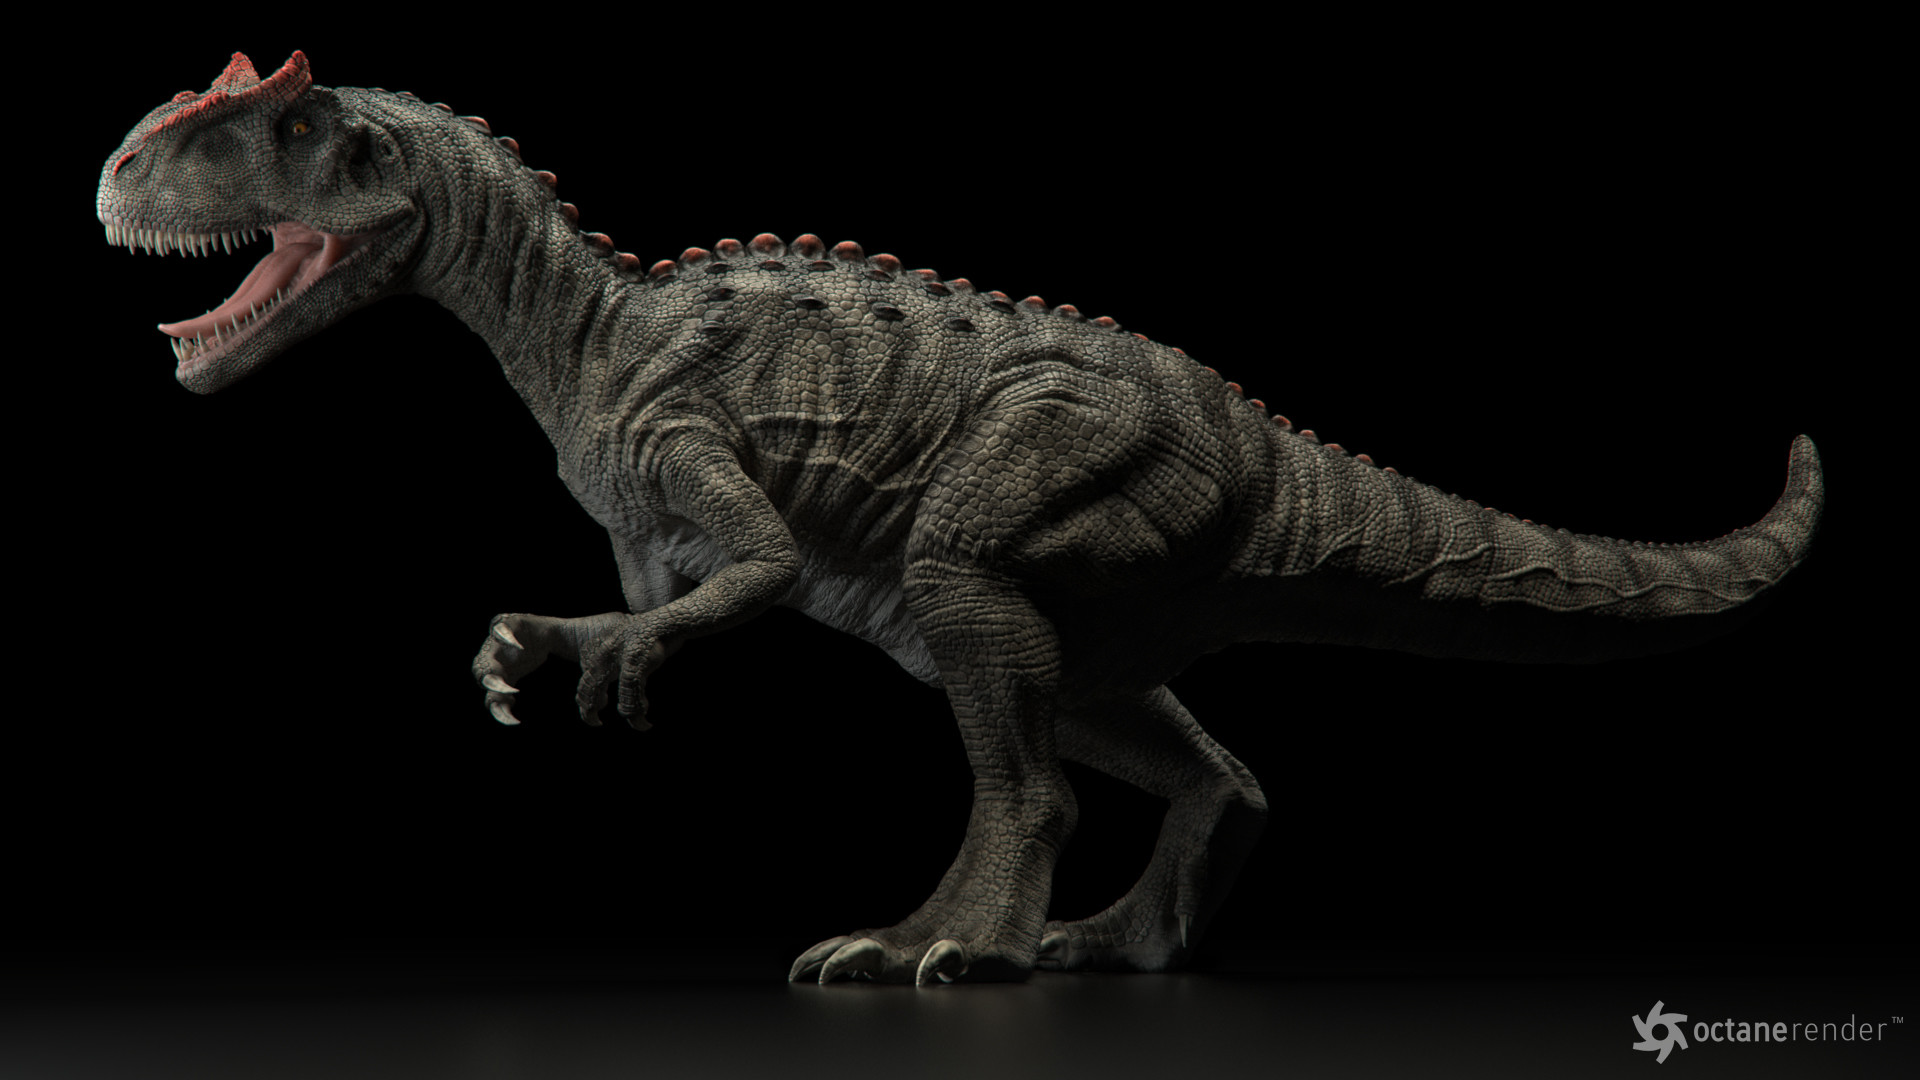
From Toy Dinosaur to Game Asset
Continuing my tutorial series, this time I will start from a toy dinosaur, 3D scan it using photogrammetry in Agisoft Photoscan, then going through the full process of cleaning, detailing, and polypaint in zBrush 4R8, retopology in Maya, UV creation in Headus UVLayout, texture setup in Photoshop, and finally a full scene setup in Marmoset Toolbag 3.
And if you enjoy ASMR, that's a bonus for relaxation. :)
Thank you to all my Patreon supporters:
Davide Porro
Kyle Steward
Jurand_M
Jason Kaehler
Olivier Beaugrand
Do you want to support me? You can go to:
https://www.patreon.com/CGPRO_ASMR and become a Patron!
From toy to game asset - Part 1: Photogrammetry with Agisoft Photoscan - ASMR
From toy to game asset - Part 2: Scan cleanup in ZBrush - ASMR
From toy to game asset - Part 3: Tweaks and skin folds - ASMR
From toy to game asset - Part 4: Sculpting the scales and finalize the model - ASMR
From toy to game asset - Part 5: Retopology with Quad Draw in Maya - ASMR
From toy to game asset - Part 6: UV Creation with Headus UVLayout - ASMR
From toy to game asset - Part 7: Polypaint in ZBrush - ASMR
From toy to game asset - Part 8: Texture extraction workflow - ASMR
From toy to game asset - Part 9: Final scene in Marmoset - ASMR